Neilson Family
A Neilson Thing!

A Neilson Thing!
Group Type:Family

|
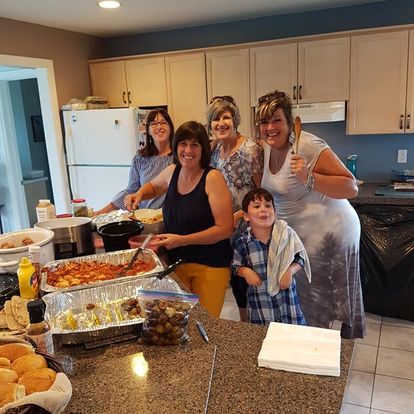
The Neilson's are a family of 8 children who grew up on the old Morand homestead in south Windsor Ontario Canada.
Ralph Neilson started dating Emily Morand while working at Webster Motors. They married and built on the Morand homestead, however their modest home soon became too small for their growing family and they swapped homes with Emily's parents, Gilbert and Irene Morand. That was to be Emily's home for nearly her entire life, except for the first few years of her marriage.
The kids in order of age are Judy Breton, Paul Neilson, Karen Taylor, Mark Neilson, Bryan Neilson, Jill Kanwischer, Jane Berthiaume and Norma Neilson.
This tree holds many stories and memories of the Neilson siblings as well as many favourite recipes both old and new.


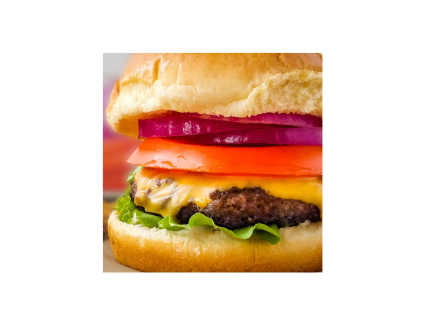
Sliders are great for dinners, potlucks or as an appetizers. They are so much fun at parties for people to create their own style of burger. Offer many toppings and be sure not to overcook the meat!

40 mins

30 mins

6-8 mins

12-16 Patties
For venison sliders be sure to retain all the excess grease from the bacon to add to the venison meat when cooled. Venison is extremely lean and needs all that extra fat so it doesn’t come out dry.


Food connects us to cherished memories, and my Chicken & Mango Spring Rolls always bring me back to my mom, Emily Neilson on St Paddy's Day. She loved a good party and never missed a chance to celebrate, especially on St. Patrick’s Day—her favourite holiday. Dressed in green, she’d sip her green beer, laughing and dancing like no one was watching. In later years, my sisters and cousins joined in, but she was always the life of the party.
These fresh, vibrant spring rolls reflect her zest for life. The mix of tender chicken, sweet mango, and crisp vegetables in delicate rice paper creates a perfect bite—light yet full of flavour, just like her spirit. Mom believed in making every moment count, so in her honour, I share this recipe with you. Pour a drink, gather loved ones, and enjoy these delicious bites while dancing like no one’s watching—just like Mom would have wanted.
Not Mentioned
Not Mentioned
Not Mentioned
Not Mentioned
Spring Rolls:
If you are not eating these immediately, wrap them individually with plastic wrap to hold in the moisture of the rice paper.

Not Mentioned
Not Mentioned
Not Mentioned
Not Mentioned
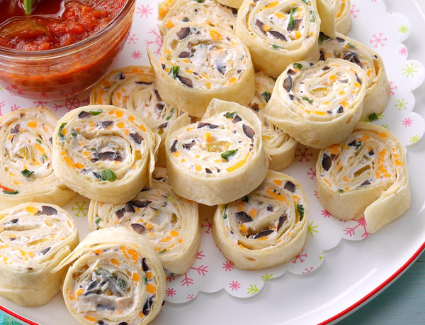
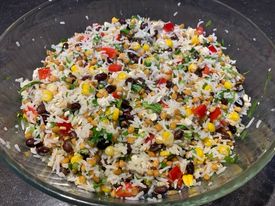
This recipe was modified to incorporate the "Cowboy Candy"Jane cans every year. What is "Cowboy Candy" you ask? Well it's a sliced jalapeño pepper that is canned in a sweet syrup. Cowboy Candy is sweet yet spicy. Kind of similar in flavour to jalapeño jelly. The peppers are the star and add amazing flavour even though it doesn't seem like there are a lot of them in there.
45 mins
15 mins
0 mins
4-5 tortillas
Although many people like this recipe with chicken, I find the black beans add a lot of flavour to the roll up.

Who doesn't love a really good deviled egg, and this is a really good deviled egg! Especially when you're using farm fresh ingredients like the eggs our chickens lay.
45 mins
30 mins
15 mins
24

Not Mentioned
Not Mentioned
Not Mentioned
Not Mentioned
Hats:
Hats:
Filling:
Alternate filling (perfect for Thanksgiving or Christmas): 1 1/2 cups finely chopped cooked turkey 2/3 cup dried cranberries, finely chopped 1/3 cup whipped cream cheese.

These are Tim Berthiaume's favourite "go to" happy hour appetizer. If you love TexMex flavours you will love serving these fun little treats. They are especially popular with men at parties.They are a larger, more hearty bite.
48 mins
30 mins
18 mins
3 Trays
Filling:
Make the cups:
Make filling:


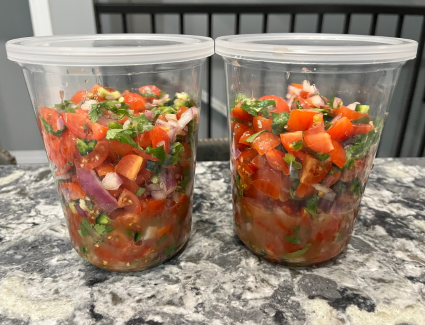
Every bite of this Pico de Gallo is a burst of pure garden freshness—because nearly every ingredient comes straight from Jane’s own backyard. But the story of this recipe starts a little further from home.
Jane first discovered it at Old World Garden Farms in Ohio, making a special trip all the way from her hometown of Leamington, Ontario, to see their incredible gardens firsthand. Inspired by what she saw, she came back determined to recreate the same abundance on her own land. Over time, she not only emulated their garden but added her own improvements and twists, tailoring it to the rich soil and growing season in Leamington.
20 mins
20 mins
0 mins
1 Bowl
It is best if you cover and let rest for a few hours in the fridge to blend the flavours. (but it isn't necessary)
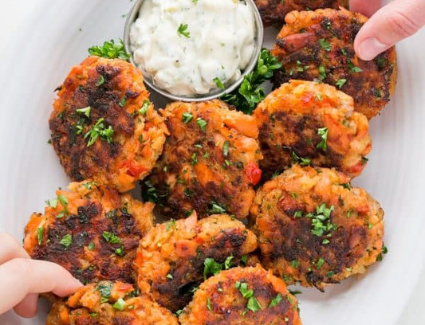
I am not a huge fan of salmon but I will eat it this way especially with the fresh tartar sauce. For smaller appetites this makes a nice meal for 2 or you can serve it up as an appetizer for tapas nights.
45 mins
15 mins
30 mins
2-4
Tartar Sauce:

Not Mentioned
Not Mentioned
Not Mentioned
Not Mentioned
Chopped water chestnuts can also be added for extra crunch.
If you want to avoid people double dipping, and you are using mini pita’s cut in half, you can pre-stuff them and arrange them on a serving dish.

Not Mentioned
Not Mentioned
Not Mentioned
Not Mentioned
This dip should be served close to room temperature or it will break your nacho chips.

Not Mentioned
Not Mentioned
15 - 20 minutes
Not Mentioned

Not Mentioned
Not Mentioned
Not Mentioned
Not Mentioned


These are a fan favourite at any summer party! As you can see from the photo Jane and Phil harvest many a watermelon on the farm. Mint grows wild by the chicken coop and we think everything is better with feta on top!
20 mins
20 mins
Not Mentioned
24 Skewers
If you're out of mint, you can substitute it with basil. Both herbs offer a fresh and invigorating flavour.


As a child I remember Auntie Pearl laying out a blanket in the dining room and setting up a picnic for my cousin Ann and I complete with these tea biscuits, butter and honey. Good times!
Not Mentioned
Not Mentioned
12 minutes
Not Mentioned

What a great way to use zucchini and hide the veggies in this recipe! This biscuit is savoury and packed with flavour. It is a lot more moist than a tea biscuit and is great as a snack with butter or along side your meal. Jane discovered this recipe when researching how to use up all the zucchini growing in the garden.
42 mins
20 mins
22 mins
12 Biscuits

I first had this recipe at Sue Pekor's house at a Hall holiday brunch. Delicious!
Not Mentioned
Not Mentioned
Not Mentioned
Not Mentioned

This recipe is a girl's weekend favourite for Jane's friends. It takes a while to make but you can make it a day ahead and just pop it in the oven the next morning. It is very hearty and satisfying!
1 hr 40 mins
30 mins
1 hr 10mins
8
1. Prep Work (Sous Chef can do while chef creates the meat mixture)
2. Meat Mixture
3. Layering The Dish
4. Final Steps

On Jane’s farm, the berry patch is a rainbow of flavors, but nothing grows with quite the same wild enthusiasm as her blackberries. Every summer, the canes bend under the weight of plump, sun-warmed fruit, their deep purple juice staining fingers and smiles alike.
This jam is Jane’s pride—a jewel-toned spread that bursts with sweet-tart flavor. But here’s her little secret: while it’s delicious on toast, it’s downright irresistible when spooned over a wheel of warm, gooey brie. Pair it with a crusty baguette, and you’ve got an appetizer that will have guests hovering by the serving table until the last drop is gone.
Best of all? It’s simple enough to whip up in an afternoon, yet special enough to make you the hero of your next gathering. Just one bite, and you’ll see why Jane’s blackberry jam isn’t just a recipe—it’s a celebration in a jar.
1 hr 15 mins
45 mins
20-30 mins
6 250ml Jars

Cowboy Candy: The Sweet Heat That Steals the Show
This isn’t just a condiment—it’s a revelation. Cowboy Candy takes humble jalapeños and transforms them into golden rings of sweet heat, preserved in a syrupy brine that somehow makes everything better. From burgers and brisket to pizza and cheese boards, these fiery little gems add a kick of flavor and a burst of memory to every bite.
We found this recipe on OldWorldGardenFarms.com and it quickly became a staple in our family kitchen. In fact, we now grow an entire row of jalapeño plants just to keep up with our craving. It’s that good.
Whether you’re slathering it on a sandwich or spooning it over cream cheese and crackers for a crowd-pleasing snack, Cowboy Candy is one of those recipes that turns into a tradition overnight. Also check out our Cowboy Candy Rollups!
3 hrs
1hr
Not Mentioned
8-10 250ml Jars
If you want to do the small gift size jars, this is how many they will make. 18-24 125ml Jars


Jane traded some salsa for a jar of this chili sauce and loved it. Orpha is 100 years old at the time of adding this recipe and is a little spitfire! She walks everyday and inspires everyone around her to get or keep active. She was Emie Neilson's (Jane's Mom) good friend.
Not Mentioned
Not Mentioned
Not Mentioned
22-24 250ml Jars
You can also add a few jalapeno peppers if you like this spicy. To me it doesn't need any heat but you do you...

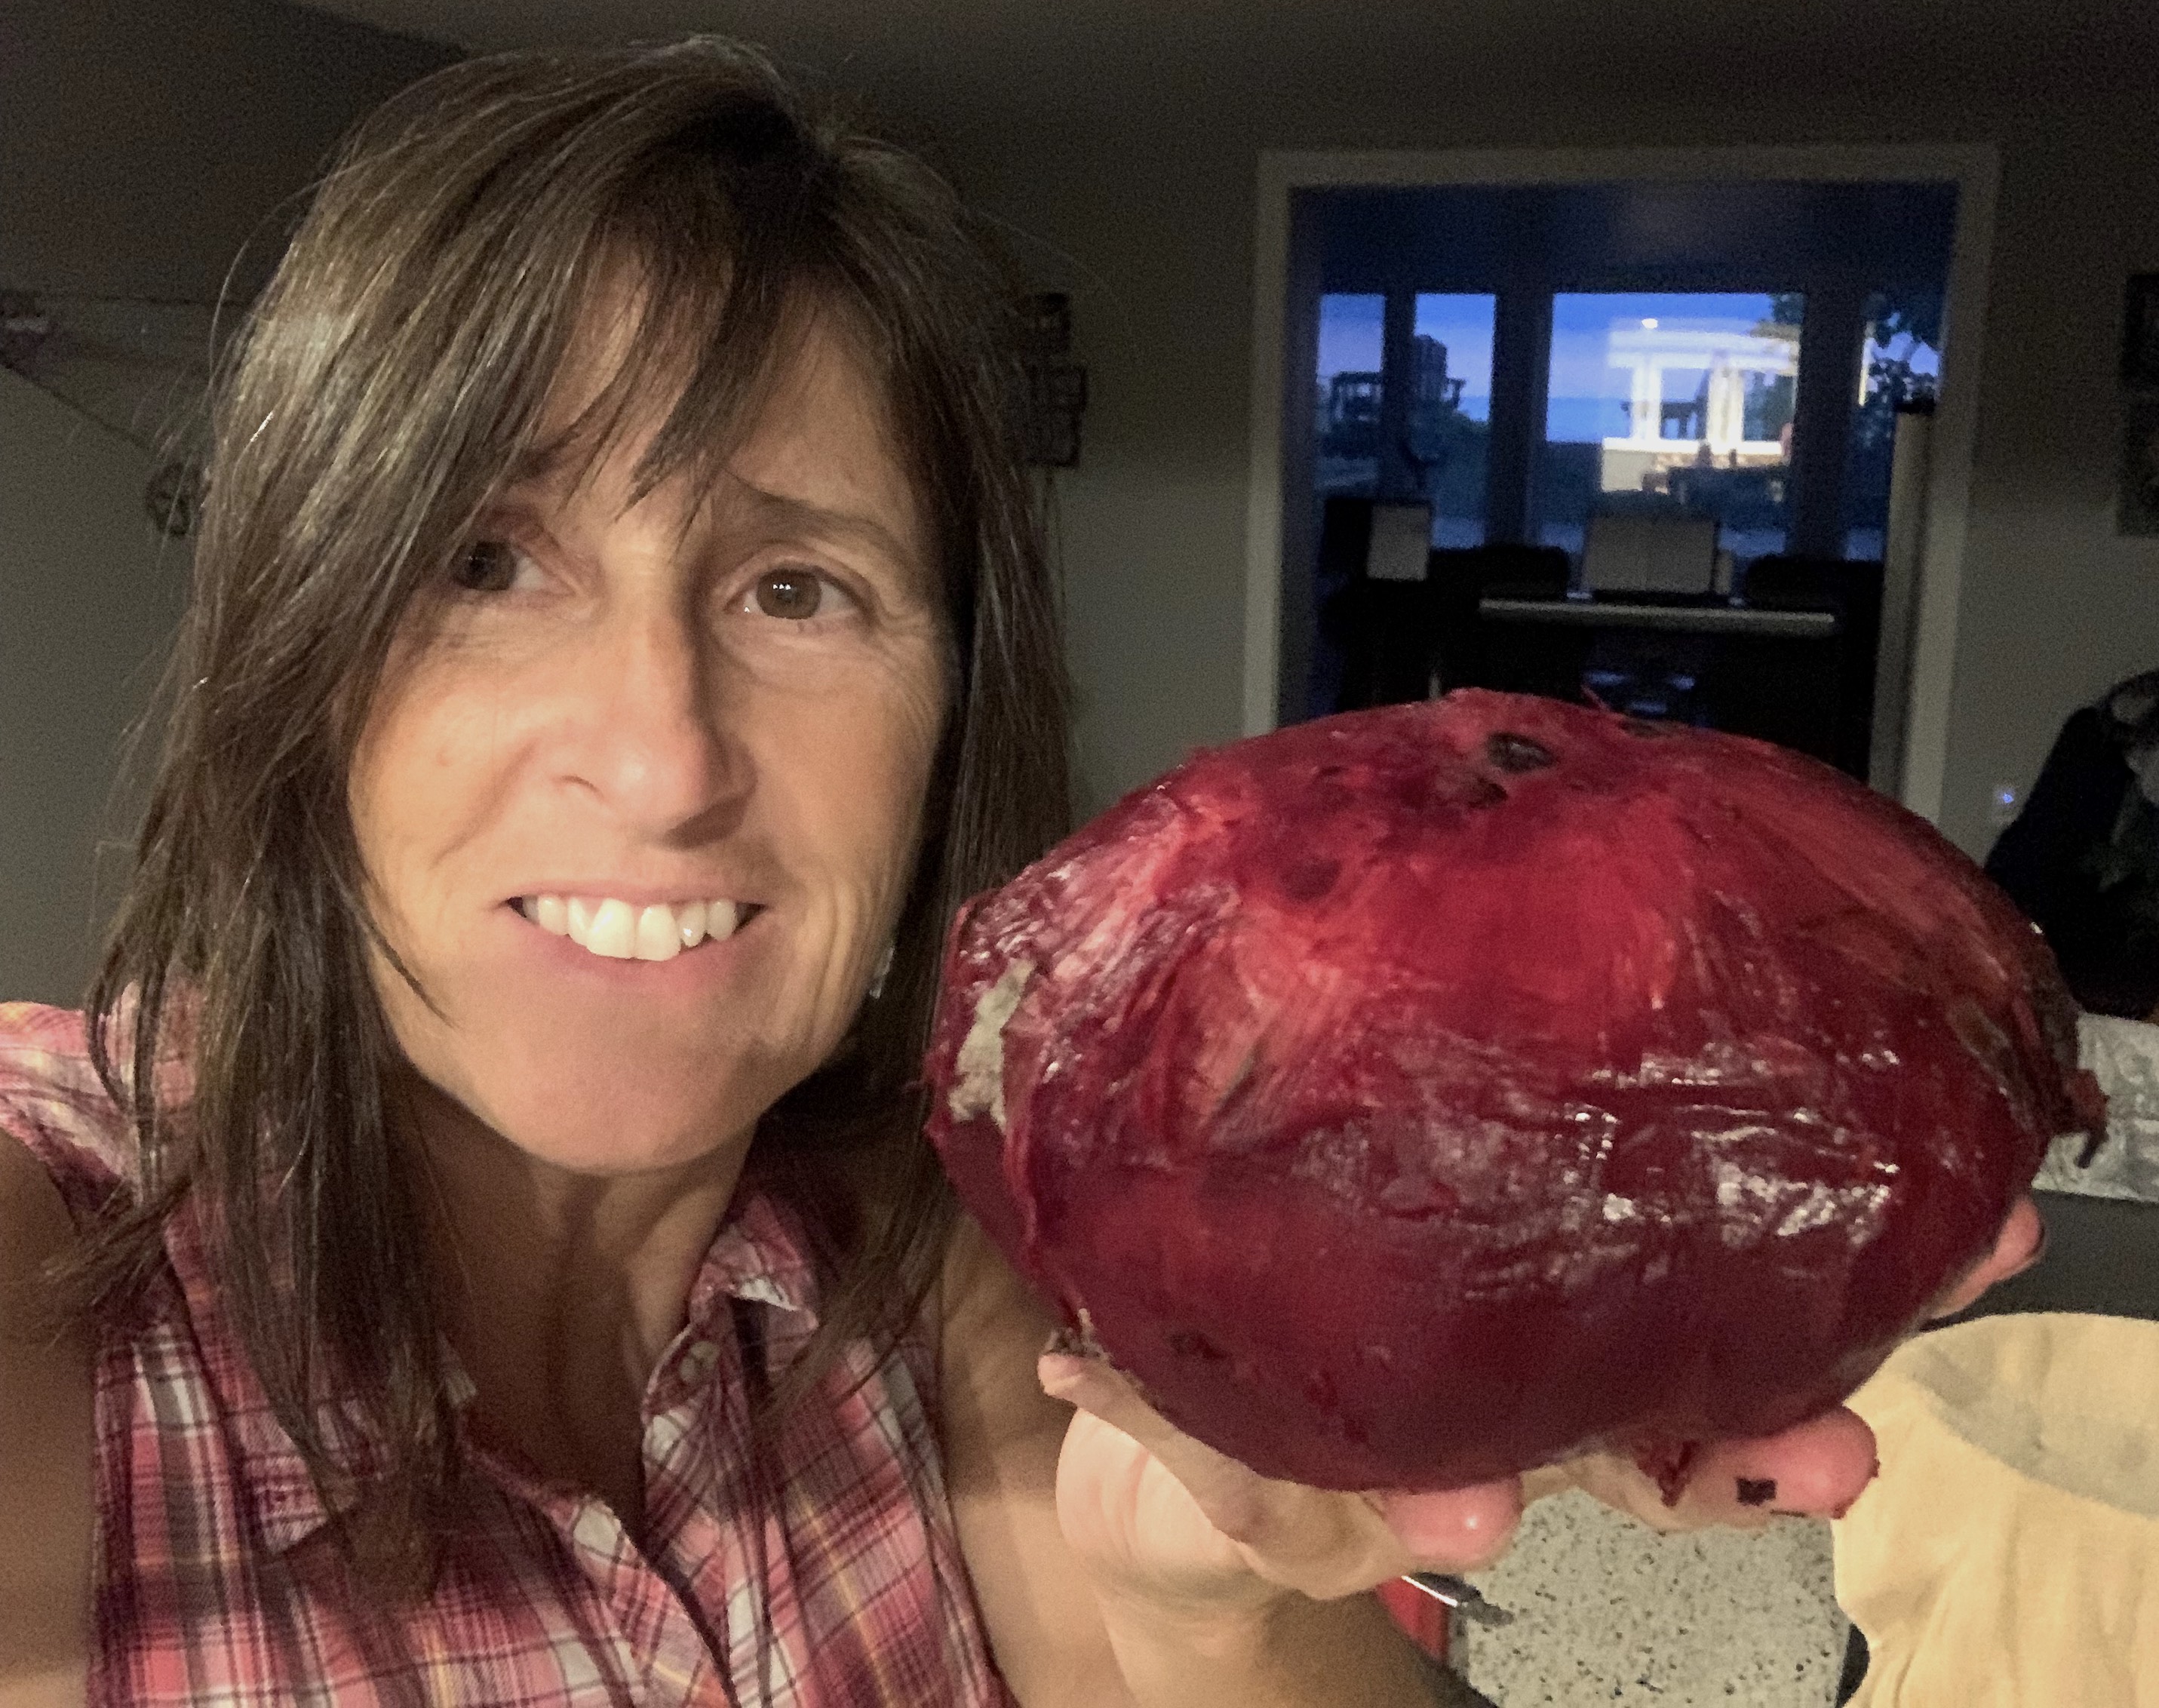
Jane grows massive beets in her garden so this is a great way to preserve them!
Not Mentioned
Not Mentioned
Not Mentioned
7-8 1L Jars
You may become a bit hot, sweaty, and irritable during this process, but it's all worth it in the end! If doing 500ml jars you can expect to make about 15 jars.
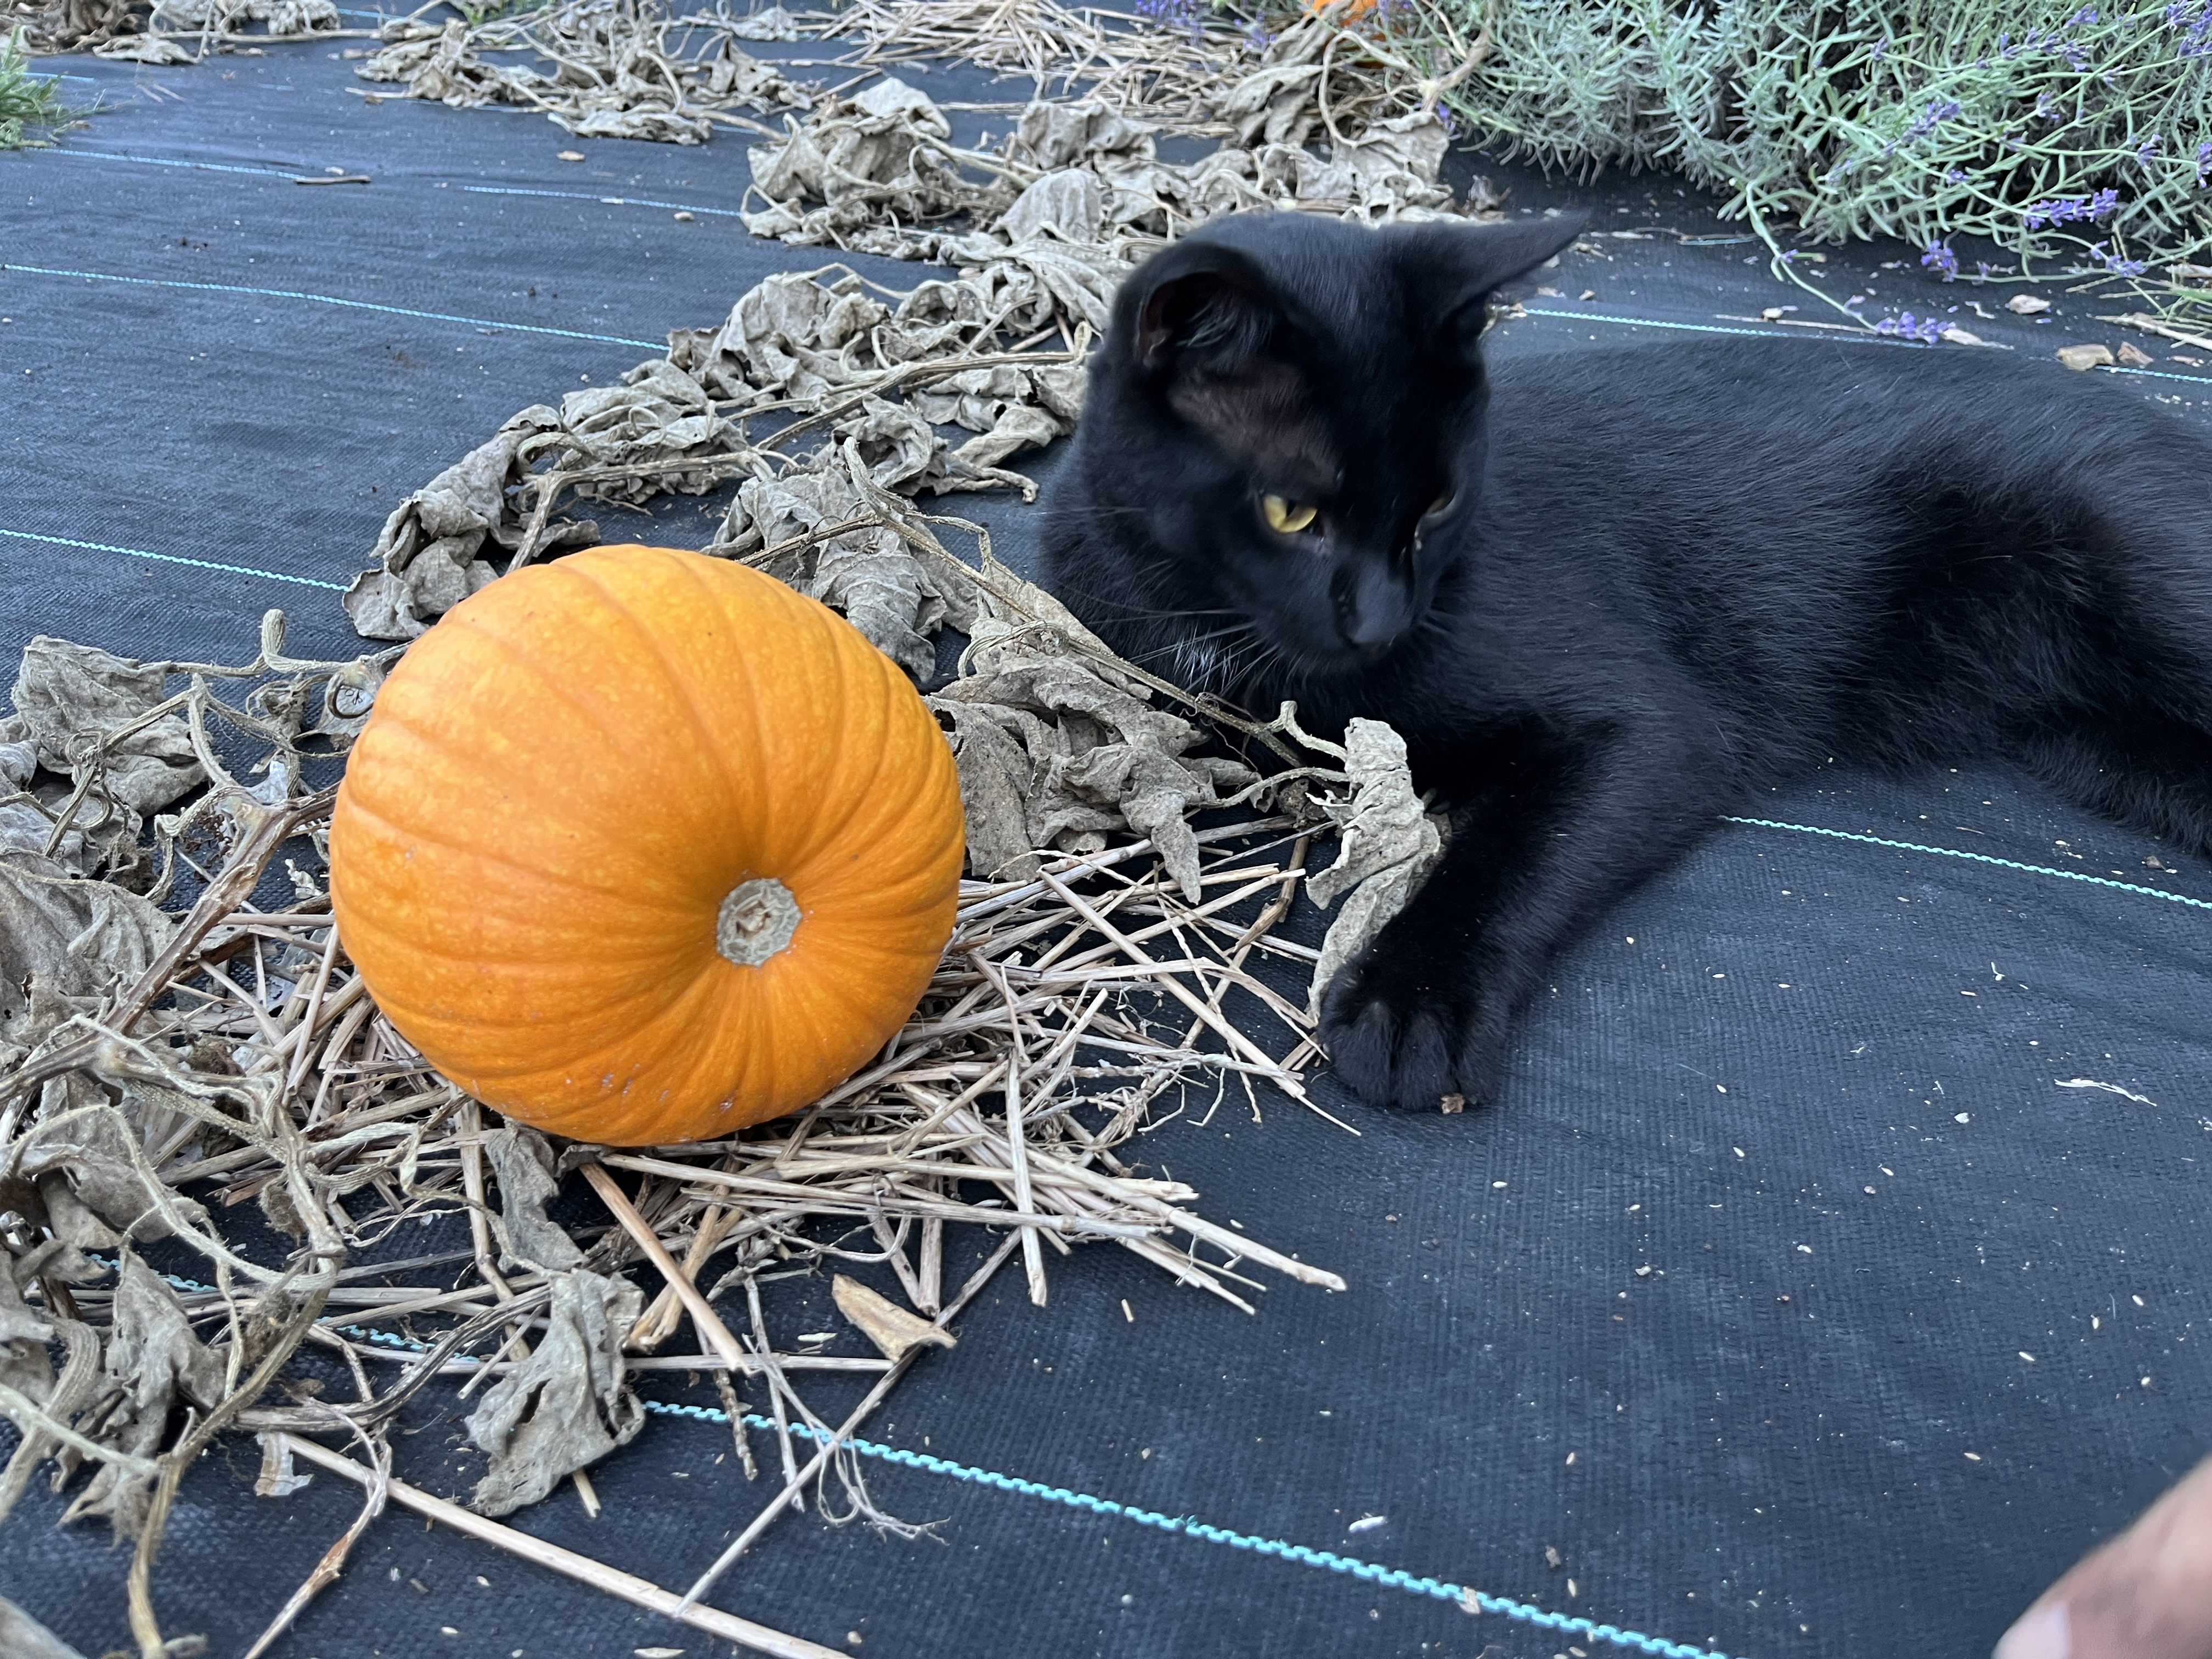

Jane has many recipes that use the sugar pumpkins from her garden so preserving it in a puree is key.
Not Mentioned
Not Mentioned
Not Mentioned
Approx 4 cups
See video for details.

Some recipes earn their spot in the family hall of fame from the very first taste—and this salsa is one of them. It’s fresh, zesty, and just the right amount of addictive. In fact, Jill Kanwischer swears it’s so good, she once literally licked the bowl clean.
It’s the kind of salsa that makes tortilla chips disappear in record time, adds a burst of brightness to tacos, and has a way of showing up at every family gathering. The recipe itself carries a bit of history—passed to me by Normand Bourque, who lived in the Neilson family home when he first moved to the Windsor area. Normand has a gift for flavor, and this salsa is just one of several stellar dishes he’s shared with us over the years.
One taste, and you’ll understand why this one’s a keeper.
1 hr
45 min
15 mins
14 - 250ml Jars
See video for details
If you are doing 500ml jars you will make 6 jars.


My twin sister Jane decided it would be a good idea to build a chicken coop on her farm and decided I should help. I helped by serving us Amaretto Mimosa's before starting our fun filled day of construction. I would recommend these as a great jump start to any event!!! Christmas breakfast might be more appropriate than chicken coop building, but to each their own!
Not Mentioned
Not Mentioned
Not Mentioned
Not Mentioned
Per Glass:
Pitcher:

Not Mentioned
Not Mentioned
Not Mentioned
Not Mentioned
Shake it up with ice, drain and serve.

Not Mentioned
Not Mentioned
Not Mentioned
Not Mentioned
A classic recipe from my Aunt Ethel Lalor.
Not Mentioned
Not Mentioned
1 hour
Not Mentioned
I like to add 1 - 1 1/2 cups of chocolate chips to my batter. Another alternative to add would be pecans or walnuts.
Also, if you have a mini-loaf tray, bake at 350℉ for 25 minutes.

I learned to make these squares while vacationing at my Aunt Ethel Lalor's cottage in Haliburton. The cottage was aptly named "Shangri-Lalor" and to this day remains in the family (Cousin Jan).
Not Mentioned
Not Mentioned
Not Mentioned
Not Mentioned

Not Mentioned
Not Mentioned
25 - 30 minutes
Not Mentioned
Cookie Layer:

Not Mentioned
Not Mentioned
45 mins
Not Mentioned
Crust:


My cousin Jane Saro brought these cookies to our 2022 annual Shop Til You Drop weekend at my cousin Ann's house and they are DELICIOUS!!!
62 mins
10 mins
13 mins
40 cookies
These cookies can be frozen. Let them cool to room temperature, transfer to air tight container and freeze for up to 3 months.


I made this for my friend Lisa Souchuk's birthday and she swears it was the best ever. Super easy especially if you aren't the most experienced at applying icing. Give it a shot.
Not Mentioned
Not Mentioned
Not Mentioned
Not Mentioned
CAKE
FROSTING
Make the batter:
To Finish:
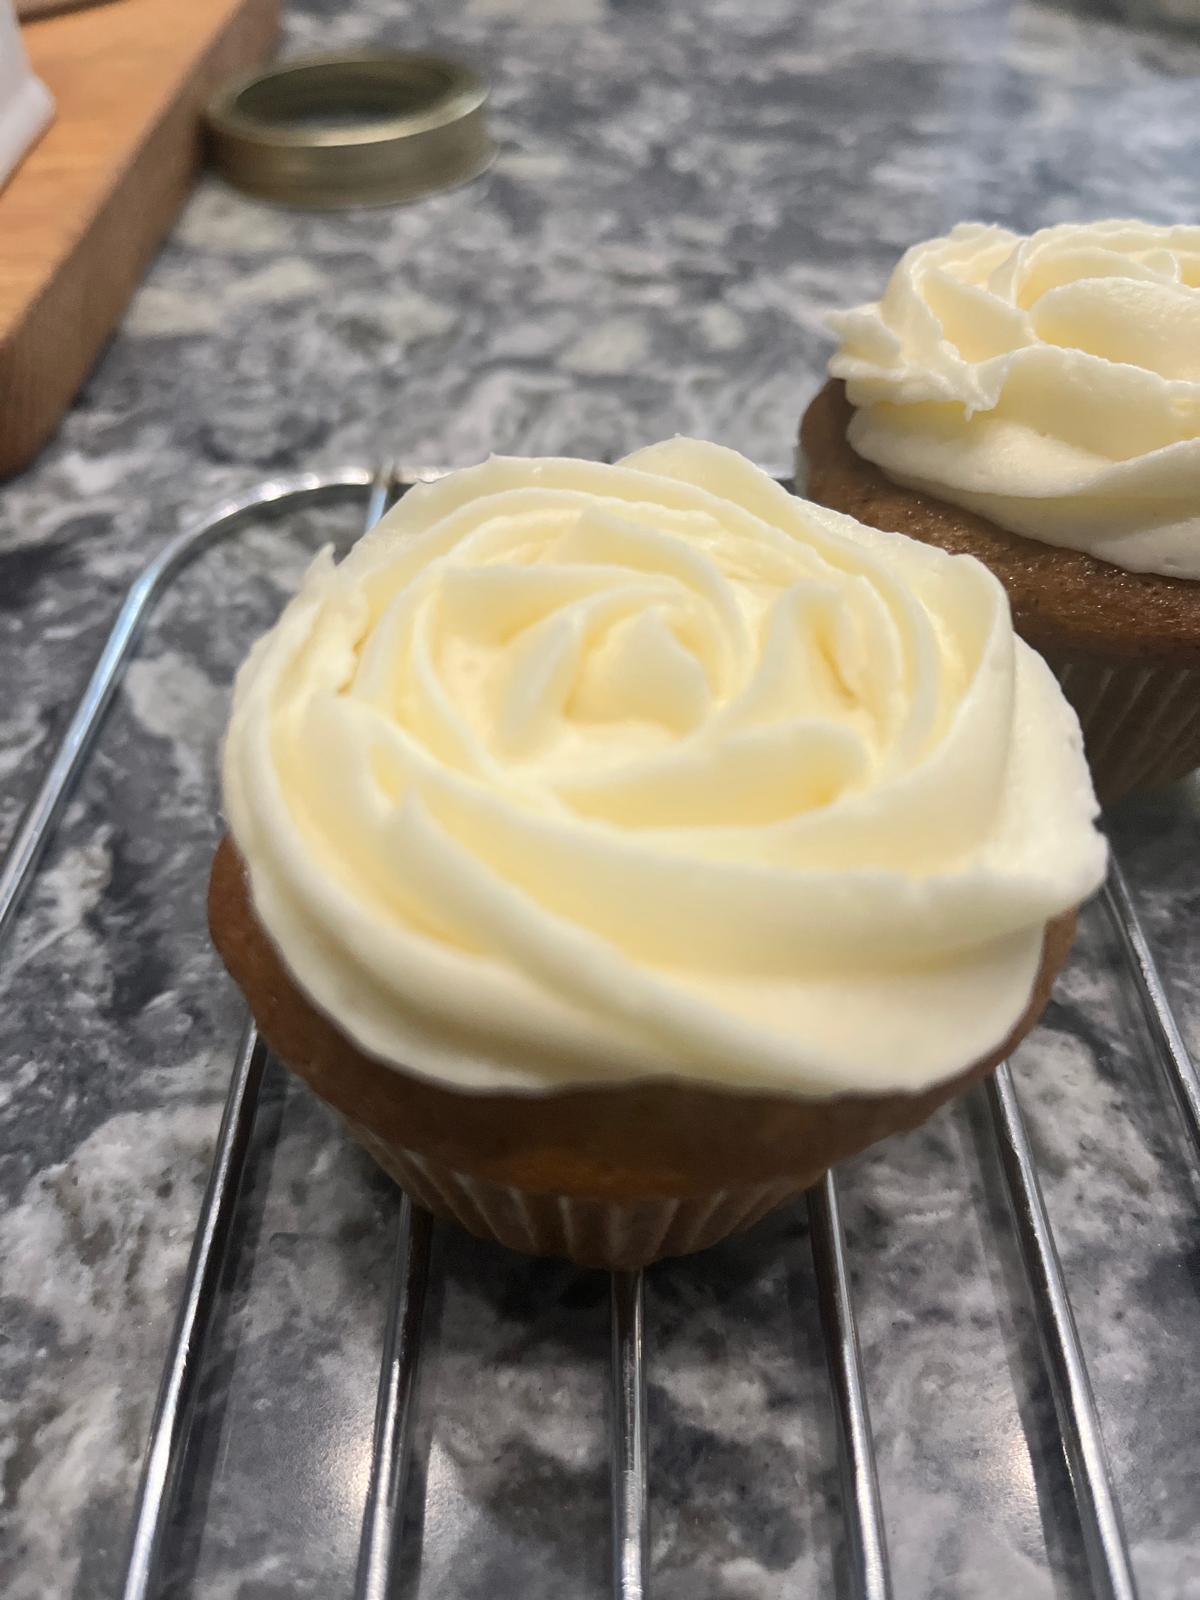


Easter is a time for celebration, and what better way to celebrate than with carrot cake cupcakes—perfect for the Easter Bunny, fun to make, and my kids’ absolute favourite! These cupcakes are a staple in our home during April, bringing joy and delicious flavour to the holiday.
Made without nuts (since my boys are allergic), these cupcakes are moist, spiced just right, and topped with a rich cream cheese frosting—because, let’s be honest, no self-respecting carrot cake should be without it!
Baking these treats has become a cherished Easter tradition in our family, filling our kitchen with warmth and the sweet scent of cinnamon and carrots. Whether you’re making them for kids, guests, or just for yourself, these cupcakes are sure to bring a little extra joy to your Easter celebrations. So preheat that oven, grab your whisk, and enjoy a festive treat that’s as fun to make as it is to eat!
1 hr 40 min
60 mins + 60 mins to cool
20 mins
12 - 16
Cupcakes:
Cupcakes:
Frosting:


Light and fresh, this is one of my favourite recipes. For those of you who often crack your cheesecake (that includes me), this recipe is for you! The topping will cover any cracks, and it will be a masterpiece every time. My son Alek is in the pictures, making this for his girlfriend's birthday.
Not Mentioned
Not Mentioned
60 minutes
Not Mentioned
Crust:
I do not put the berries on top of the cheesecake, instead, I serve them on the side so people can choose the type of berry and quantity. If you put the berries on top you run the risk of the cheesecake getting wet from the berry juice and looking a mess. It is okay if you are planning on eating the entire cake in one sitting but it is a large cake.

Not Mentioned
Not Mentioned
Not Mentioned
Not Mentioned
This can also be done in an air-fryer at 325°F for 8 - 10 minutes.

Not Mentioned
Not Mentioned
14 - 16 minutes
Not Mentioned
Cake:
Filling:
Ganache:
Make ahead instructions: The cake roll can be prepared completely and refrigerated for 1-2 days before serving. OR, you can bake the cake, roll it in the parchment paper to cool. Once cool, refrigerate it (rolled in the parchment paper) for up to 1 day, before filling and adding the ganache. To freeze: Prepare the cake roll completely, with the filling but do not add the ganache. Freeze for up to 2-3 months. Thaw overnight in the refrigerator before adding the ganache and then slicing and serving. Only add the final sprinkle of crushed mints if you are planning to eat the entire cake in one sitting, otherwise, it makes a wet, melty, gross mess. Also, sprinkle them on just before serving.


In the Neilson household, the kitchen was not typically Dad’s domain—except for a few cherished specialties that he made entirely his own. Among them, Ralph Neilson’s oatmeal crisp cookies stood out as a warm, familiar favourite that carried with it the quiet joy of his presence in the kitchen.
Years later, the recipe continues to ripple through the generations. Most recently, Dad’s legacy found new hands in the kitchen: his great-granddaughters. With ingredients lovingly prepared by their grandmother Karen, the little girls stirred, scooped, and shaped the very cookies their great-grandfather once made, this time as a surprise for their dad—Shawn Taylor—on Father’s Day.
It was a full-circle moment. The same recipe that once connected Ralph to his children was now connecting his great-grandchildren to theirs. Hands a little smaller, hearts just as big.
This oatmeal crisp cookie recipe is more than just a sweet treat. It’s a memory, a tradition, and a reminder that sometimes the simplest recipes are the ones that carry the most love.
45 mins
15 min + 20 min chill time
10 mins
24 cookies

Not Mentioned
Not Mentioned
50 - 55 minutes
Not Mentioned

This recipe was given to Jane by Normand Bourque who lived in the upstairs apartment at the Morand homestead (Home of the Neilson's) when he first moved to Windsor for a teaching position. A tenant then and now a friend for life because that's how the Neilson's roll! This is a great way to use the massive amounts of zucchini that grow in the garden each year!
Not Mentioned
Not Mentioned
Not Mentioned
10-12 Muffins/1 Loaf
Muffins:
Preheat oven to 425°F (218°C) degrees and spray a 12-count pan with nonstick spray or line with cupcake liners. Prepare batter as directed above, fill each liner to the top with batter and bake the muffins for 5 minutes at 425°F (218°C). Then, keeping the muffins in the oven, lower the temperature to 350°F (177°C) and continue to bake for an additional 15 minutes (+2min) or until a toothpick inserted in the center comes out clean. Makes 10-12 muffins.
Loaf:
Bake for 45-55 minutes or until a toothpick inserted in the center comes out clean. My bread only took about 46 minutes, but do not be alarmed if yours takes longer. All ovens are different. Allow bread to cool completely in the pan set on a wire rack. Slice and serve when bread has completely cooled. Store leftover bread in an airtight container at room temperature for up to 5 days.

Not Mentioned
Not Mentioned
20 minutes
Not Mentioned


This cheesecake started as a version of my mom’s recipe, and over the years I’ve made it my own. I love how easy and versatile it is—my favourite way is to use fresh fruit, but you can also top it with candy bars, lemon curd, ganache, or whatever suits the occasion.
It has become my go to recipe to make for the Amherstburg Food and Fellowship Mission because I can prepare it in different ways to match so many preferences, helping everyone feel included and cared for.
Seeing it become such a fan favourite makes me smile, knowing it began with my mom and now brings joy to so many others.
30 mins
30 mins
None
6
Crust:
Cheesecake Filling:
Crust:
Cheesecake Filling:
Feel free to get creative with different toppings. You may want to leave out the lemon zest in your filling if you are using candy bar toppings.
I love to make these individually in the containers in the photo (Amazon) for the Amherstburg Mission. To have the correct quantities; the crust quantity stays the same, but I double the cheesecake. For best results put the cheesecake in a piping bag and cut off the end (no tip required). Do a layer of cheesecake, then sprinkle a rounded teaspoons of crumbs mixture, layer of fruit, repeat.


This is one of my son Karl’s favourite desserts—and one of mine too. It’s not the quickest to make, and I sometimes wish I’d chosen something simpler, but the first bite always makes it worth it.
If you’re short on time, you can use a store-bought angel food cake and build from there—it still brings the same smiles.
One of my favourite memories with this recipe was making a pink version for a colour-themed Ladies Dinner night. Everything matched—from the food to the outfits—and it was an evening full of laughter, friendship, and delicious treats.
All damn day
loooong time
35 - 40 mins
8-10 slices
Cake:
Frosting:
Cake:
Filling:
Frosting:

This recipe was a favourite at work and was made popular by an Emergency Communications Co-Ordinator (Maureen Nicholls) at Windsor Fire & Rescue Services.
Not Mentioned
Not Mentioned
20 minutes
Not Mentioned
Crust:
Crust:
This recipe was given to me by Maureen Nicholls, Emergency Communications Co-ordinator at Windsor Fire & Rescue Services.
Not Mentioned
Not Mentioned
10 minutes
Not Mentioned


Not Mentioned
Not Mentioned
40 minutes
Not Mentioned


Mom always made these cookies for her kids and grandkids. In later years (and before COVID) I used to make this recipe for the kid's school potlucks. To make it more fun I baked it in a pizza pan to make one large cookie and usually wrote a message on it with icing. The kids would just break off a chunk of the cookie or you could cut it with a pizza cutter.
Not Mentioned
Not Mentioned
Not Mentioned
Not Mentioned
If you want to make one large cookie, spread the dough into a round pizza tin (with no holes) and bake 375℉ for 12 - 14 minutes.


These chocolate squares are easy and delicious, but watch out for the nuts! You can make them without nuts but they really aren't as good. Speaking of nuts. That reminds me of the time my Mom made these brownies and gave them to my son Karl, who has a severe nut allergy. Well, she damn near killed him! We had to call an ambulance and spent the day in the emergency room. Poor Mom felt so bad ... although not so bad that she didn't flirt with the EMS guys who attended. Another funny part of the story is that I knew one of the EMS guys. He was in the high school co-op program at Windsor Fire & Rescue Services when I worked there. A few years after that incident, he quit EMS to join Windsor Fire & Rescue Services. Small world. Shout out to Remy Cusinato ... thanks for saving my kid!
Not Mentioned
Not Mentioned
25 minutes
Not Mentioned
BASE
ICING
BASE
ICING


Not Mentioned
Not Mentioned
55 - 60 minutes
Not Mentioned


Not Mentioned
Not Mentioned
Not Mentioned
Not Mentioned


This recipe always makes me smile because I can still picture my mom and dad making it together in the kitchen. Back then, mixing the dough by hand was a real workout, so they would take turns kneading.
The recipe came from our longtime Scottish neighbour (Mrs. McWhinnie) and quickly became a treasured family favourite. Every time I make it now—by hand, the right way—I think of those special kitchen moments and where it all began.
1 hr 20 min
1 hr
20 mins
Depends on your cookie cutter
You can make this recipe completely by hand kneading if you have the strength and patience. Just like the instructions above, start by kneading the sugar and butter until well creamed together before you start to gradually add in the flour. You will know it's done when the dough doesn't crack as you are kneading it. Good luck!

Not Mentioned
Not Mentioned
Not Mentioned
Not Mentioned


Not Mentioned
Not Mentioned
Not Mentioned
Not Mentioned
Jam:
Crust:
FIlling:
Jam:
Crust:
Filling:

Warning: dangerously sweet! This internet-found recipe comes with a sugar rush alert—but that’s part of the charm. So rich and decadent, you only need the tiniest bite, which means a single pan can yield over 60 mini pieces. I used to make these for office events and potlucks, and they never lasted long. No matter the crowd, they’re always a fan favourite.
Not Mentioned
Not Mentioned
30 minutes
Not Mentioned
Caramel Filling:
Base:

My sister Jane Berthiaume makes me fresh pumpkin puree out of her garden and in exchange I bake her delicious pumpkin desserts. I'm not sure who comes out ahead in this deal but it is always fun to make new things with pumpkin puree. This recipe does not require a mixer and is virtually fool proof. Great for a new baker or making with the grandkids (if I had any!)
1 hour
15 min
45 min
9 - 16 squares
Pumpkin pie filling can NOT be substituted for pumpkin puree or canned pumpkin.
Ensure your pan is well greased ... this batter is sticky! Butter works better than cooking spray on this recipe.
Ensure your brownies are cooked by making sure the center doesn't look wet or jiggles too much with a little shake.
Brownies are good for 3 days if stored at room temperature and up to a week in the fridge.


I found this recipe while trying to use up the pumpkin puree my sister Jane made from the sugar pumpkins in her garden, and it instantly became a favourite.
I love thinking about Jane baking it when her granddaughter Delilah came to visit from Calgary, the two of them laughing in the kitchen and turning garden ingredients into something delicious together.
There’s something extra fun about knowing the pumpkin came straight from her backyard, making every bite feel homemade, and full of happy family memories.
2 hrs 45 mins
30 min + 1hr cool + 1hr chill
13-15 mins
10-12
Cake:
Filling:
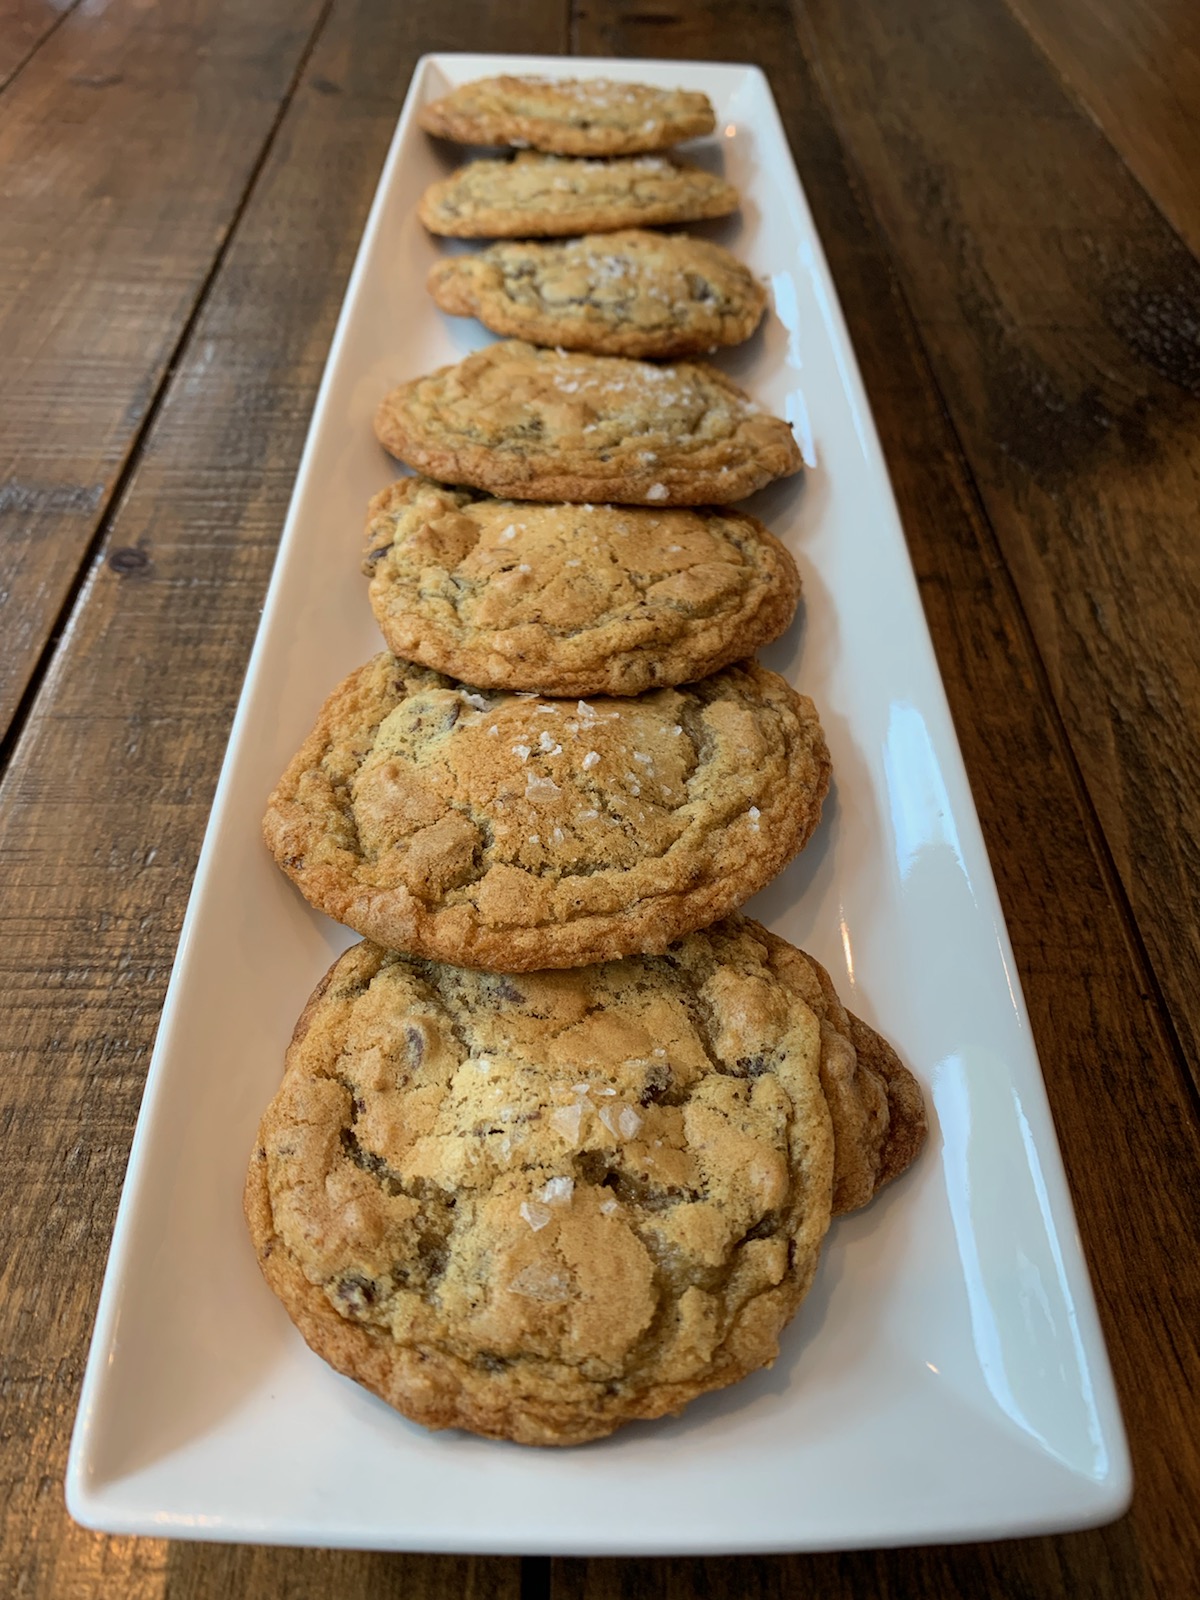


I went searching for a chocolate chip cookie recipe that could somehow outshine my mom’s—the ones that vanished from the freezer, leaving behind empty containers and a lot of quiet guilt because they were just that good.
It felt almost impossible to top something so loved, but then I found this salted chocolate chunk version online and decided to try. The first batch came out rich, gooey, with that perfect hint of salt—and just like that, they disappeared just as fast. Now, somehow, this is the recipe everyone asks me for, and I can’t help but smile and say, “Sorry, Mom.” This recipe matters because it carries on our family’s love of irresistible cookies with a new twist.
47 mins
20 mins + 20 mins chill
6 - 7 mins
24 cookies

I absolutely love butter tarts, but I’ve never been a fan of making pastry—and to be honest, traditional pie crust just doesn’t do it for me. What I do love, though, is shortbread. So I went on a hunt for a butter tart recipe that used a shortbread base instead. That’s when I discovered this gem online. It’s a fantastic shortcut that delivers all the classic butter tart flavor in an easy-to-make, crowd-pleasing square. Not only is it simpler than making individual tarts, but it also yields a generous batch—perfect for sharing at parties or potlucks.
Not Mentioned
Not Mentioned
25 minutes
Not Mentioned
Base:
To make a smaller recipe in an 8 x 8 pan follow the same instructions above with the following measurements: Base: 1 1/4 cups of all purpose flour 1/4 cup + 2 tbsp granulated sugar 1/2 cup + 4 tbsp of butter Topping: 3 tbsp unsalted butter, melted and cooled 3 large eggs, lightly beaten 1 1/4 cups packed brown sugar 3 tbsp all purpose flour 3 tbsp corn syrup 1/4 tsp (generous) baking powder 1/2 tsp (generous) vanilla pinch of salt 1 1/4 cups golden raisins 1/2 cup + 4 tbsp pecans, coarsely chopped.


This memory goes back to my days working at Windsor Fire & Rescue Services. One of my colleagues made a vegan chocolate cake for the birthday of Emily, our Emergency Planning Officer. I think the recipe came from the internet, but it didn’t matter — the cake was rich, chocolatey, and absolutely delicious.
Even non-vegans couldn’t resist sneaking a slice! Every bite reminds me of the camaraderie at the station and the little celebrations that brightened our busy days.
This chocolate cake remains one of my favourite treats and a sweet reminder of Emily’s birthday at the fire hall.
2 hrs
30 mins + 1 hr to cool
30 - 35 mins
12 - 24
Cake:
Chocolate Buttercream Frosting:
Cake:
Chocolate Buttercream Frosting:
For cupcakes, fill liners half full and bake for 20-25 minutes. The whole recipe will yield approximately 24 cupcakes. Double the recipe to make a 4 layer cake, or cut in half to make a 1 layer round cake. You can also make a bundt cake, simply bake for 45 minutes. Or a 9 x 13 inch cake, baking for about 35-40 minutes. Don't like a lot of frosting? Cut the frosting ingredients in half. The recipe as written makes enough for thick layers of frosting. Nut allergy? You may substitute soy milk or another milk for the almond milk, any non-dairy milk will work here. No applesauce? Substitute 2 flax eggs (2 tbs ground flax + 5 tbs water), whipped aquafaba or another egg replacer such as Bob's Red Mill (2 eggs worth).


This is a very basic recipe that I taught my boys to make when they first went on their own and started cooking for themselves.
Not Mentioned
Not Mentioned
34 minutes
4
For different flavours change the spice by using Cajun Seasoning or Frank’s Red Hot Ranch Seasoning, or forget the spice and just use your favourite barbecue sauce. If using BBQ sauce … brown the chicken 2 minutes per side, move it to the pan and brush BBQ sauce on each side of the chicken before putting in the oven.

Jane and her mom Emily Neilson used to watch a show called Wok With Yan and this is where a love for stir fry began. This recipe is stolen and modified to Jane's taste from a site called Natashas Kitchen which has many great recipes by the way.
45 mins
30 mins
15 mins
6 - 8
Beef and Broccoli Ingredients:
Stir Fry Sauce Ingredients:
Beef & Broccoli Stir Fry freezes well and makes great leftovers. This is a large batch so you will have leftovers.

This is a basic Pad Thai dish anyone can do. I found this while searching the internet for new recipes. I made just a few tweaks to make it my own. Preparation is everything on this dish. Make sure everything is chopped, measured and lined up on the counter and your job will be stress-free while you cook.
40 mins
30 mins
10 mins
2-3


I stole this recipe from my twin sister Jane. I made this in large quantities and would put it in single serving dishes and freeze it for my son Alek. He took it for lunch practically everyday for a couple years running. I’m not sure if he loved it that much or he was just too lazy to make something else for lunch.
Not Mentioned
Not Mentioned
Not Mentioned
Not Mentioned

This is a good old stick to your ribs kind of recipe. We go the extra mile to make this with fresh ingredients rather than canned soup. It tastes better without too much fuss.
35 mins
15 mins
20 mins
4

Who has ever heard of chili that wasn't made from tomatoes? I hadn't either but with all the pumpkin puree left over from this year's garden I had to search out recipes to use it all up. This is a tasty, creamy version of chili that is surprisingly good! The key to elevating this dish is a dollop of sour cream and fresh chopped cilantro on top. The chipotle peppers add a nice smoky kick. You cilantro haters might just change your mind on this recipe!
1 hr
30 mins
30 mins
8
With chili everything is an estimate. If you find it too thin you can add more meat or beans, too thick add more broth. My pumpkin puree from the garden is thinner than store bought so I add the full 3 lbs of ground meat to make my chili thicker..

Jane had so many Roma tomatoes from her garden that she searched out a Chili recipe that used fresh tomatoes. This Chili also has an option to use canned tomatoes if you don't have fresh tomatoes on hand. This recipe is a hit with Jane's boys done either way!
1 hr 30 mins
30 min
1 hr
6
If not using fresh tomatoes you can substitute a large 28oz can of diced tomatoes, a large 680ml can of tomato sauce and an additional can of chili beans.

Not Mentioned
Not Mentioned
Not Mentioned
Not Mentioned

Lamb lovers you are in for a treat! This dish is very flavourful and delicious. Makes a great winter treat.
2 hrs 30 mins
30 mins
2 hrs
4


This is a very easy recipe that I taught my boys to make when they first started cooking on their own.
Not Mentioned
Not Mentioned
6 - 8 minutes
4
I like slice up the other half of the lemon and fry each side for about one minute then use it as a garnish.


Not Mentioned
Not Mentioned
Not Mentioned
Not Mentioned
Additional spices can be added to taste ie garlic, hot sauce, cayenne.


If there was one recipe that could fill eight hungry bellies without breaking the bank, it was Emily Neilson’s good old-fashioned Sloppy Joes.
In a house full of kids, there was no such thing as quiet mealtime chaos — it was an art form. Emily would stand over her stove, brow furrowed in concentration, stirring a big pan of simmering beef while keeping one eye on the kids who were always sneaking “taste tests.” The smell of chili powder and onions filled the kitchen, and when the buns came out, everyone knew dinner was officially on.
Emily had a rule — a famous one in the Neilson house — “I’m not a short-order cook!” She didn’t cater to picky eaters, didn’t make special requests, and didn’t tolerate scrunched-up noses. You ate what was served, or you didn’t eat. And somehow, no one ever left hungry.
Not Mentioned
Not Mentioned
Not Mentioned
Not Mentioned

My friend Julie Pare first made this recipe for me.
Not Mentioned
Not Mentioned
Not Mentioned
Not Mentioned

Tim Berthiaume is not a fan of cooking with measurements. He likes to go by taste, so season then taste and repeat. This is a bit of a copy cat recipe from the pasta at the Caboto Club in Windsor. This is his version of that recipe.
2 hrs 30 mins
30 mins
2 hrs
8


This is my kids favourite beef rib recipe but it works great on pork ribs as well.
Not Mentioned
Not Mentioned
3 - 4 hours
Not Mentioned

This recipe was given to me by my Mother-in-law Edda Kanwischer.
Not Mentioned
Not Mentioned
1 hr 20 min
Not Mentioned

This is for the hungry Texan. While living in Texas, Jane and her boys became quite accustomed to both Mexican and TexMex cuisine. This is definitely in the TexMex category.
50 mins
30 mins
20 mins
6-8

Not Mentioned
Not Mentioned
Not Mentioned
Not Mentioned
Jane is a huge fan of venison and so are her sons. You can check out the slider recipe as well but when it comes to venison her boys prefer a nice juicy burger!
40 mins
30 mins
10 mins
6 Patties

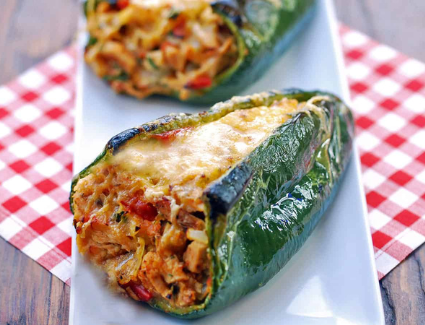
This is a hearty stuffed pepper recipe, sure to satisfy a hungry man or woman as the case may be.
1 hr 30 mins
45 mins
45 mins
6
1 hr
30 mins
30 mins
4
It's a good idea to wear gloves while handling poblano peppers to prevent chili pepper burn. In addition to oregano and cumin, I sometimes add smoked paprika to this dish. If you can only find small poblanos, you can use them to make this recipe, using 8-10 of them instead of four. They might need slightly less time in the oven. If you don't like spicy food, you can make the same recipe with bell peppers.

This recipe uses fresh tomatoes rather than canned, however canned tomatoes can be substituted in a pinch. I like to make this from fresh ingredients from my garden and freeze it for the winter.
1 hr 45 mins
15 mins
1 hr 30 mins
4
If you don't like the skins from the plum tomatoes, you can blanch and peel them or simply pull out the skins before blending.


10 minutes
10 minutes
Not Mentioned
1
Blend until smooth. Use at least one frozen fruit or add ice.

This recipe can be found on the back of the Better Made Corn Puff bag.
Not Mentioned
Not Mentioned
45 minutes
Not Mentioned
Not Mentioned
Not Mentioned
Not Mentioned
Not Mentioned

This was a favourite at the fire hall.
Not Mentioned
Not Mentioned
60 minutes
Not Mentioned

Not Mentioned
Not Mentioned
Not Mentioned
Not Mentioned


These are better than anything you'll get in any store. I use pumpkin puree that I make from sugar pumpkins grown in my garden. This makes it an even healthier treat! With the price of dog treats, you'll love this option. I double the recipe as these snacks last a long time in the freezer. They are a favourite, high reward snack my son Nathan's King Corso Mastiff dog Charlie.
1 hr
20 mins
40 mins
12-24 Biscuits
Be sure to give this dough a good dusting of flour as it is very sticky!


I first found this beet and feta salad when I was trying to make good use of the beets, green onions, and parsley growing in my garden, and I loved how fresh it tasted—especially when the beets were roasted in the oven. It was simple, a little extra work, but always worth it.
Then my twin sister Jill came back from a trip to the Planet Hollywood Resort in Cancún and told me about a beet salad she’d tried there, insisting I swap the feta for goat cheese to take mine up a notch. The first time I tried it, I mixed it too much and the goat cheese disappeared into everything, turning it creamy instead of bright. Now I know to fold it in gently at the very end, just enough to keep those soft little pockets of flavor.
This recipe matters to me because it ties my garden, my kitchen, and my sister’s adventures into one bowl.
1 hr 30 mins
30 mins
1 hr
4
Roast Beets:
Preheat oven to 400 degrees, wash beets and trim off tops. Line a baking sheet with parchment paper and place beets on top. Bake for 1 hour or until easily pierced with a fork. Allow to cool then peel and dice into bite size pieces.
Make Dressing:
While the beets are roasting, whisk together parsley, olive oil, balsamic vinegar, and red wine vinegar in a bowl until blended; season to taste with garlic, salt and pepper, and set aside.
Make Salad:
In a large bowl mix beets, feta, shallot/green onion, and dressing. Will last several days in the fridge.
I highly suggest wearing gloves to peel the beets and save the purple stain from your hands.
Goat cheese may be substituted for the feta but DO NOT overmix!
Mix in a little spring mix lettuce or arugula to your bowl when serving if you like.

This recipe was given to me by Captain John Day from Windsor Fire & Rescue Services and was a fire hall favourite.
Not Mentioned
Not Mentioned
Not Mentioned
Not Mentioned

Not Mentioned
Not Mentioned
Not Mentioned
Not Mentioned
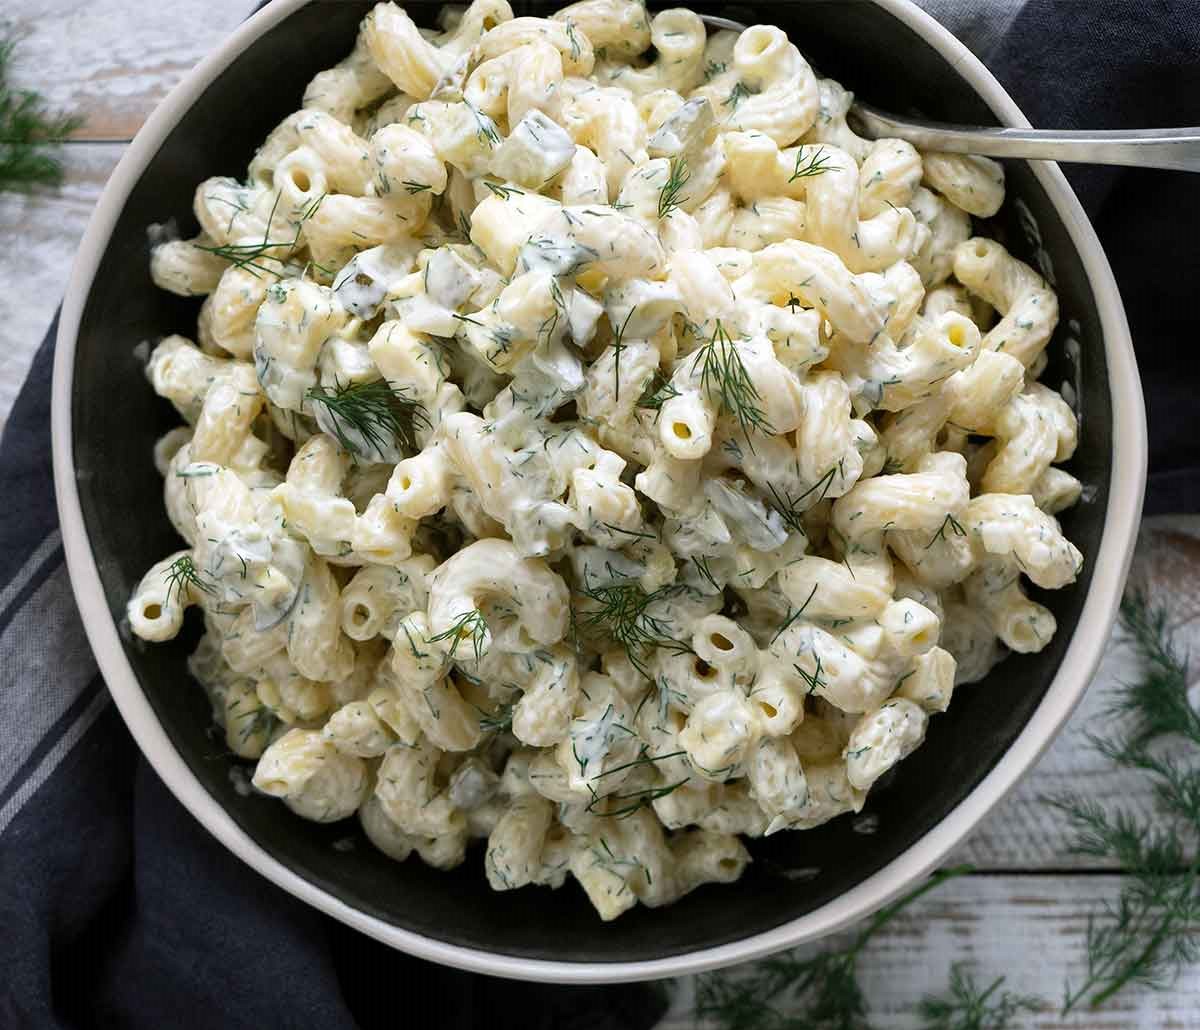
It sounded a little crazy to make a dill pickle salad but it tastes amazing! It's light and refreshing on a summer day. It makes a great side salad and something unique to bring to a BBQ.
45 mins
30 mins
15 mins
5
Not Mentioned
Not Mentioned
Not Mentioned
Not Mentioned

This is a salad recipe given to me by my Mother-In-Law and was a staple at Kanwischer family dinners.
Not Mentioned
Not Mentioned
Not Mentioned
Not Mentioned


Not Mentioned
Not Mentioned
Not Mentioned
Not Mentioned
Dressing:
Storage: If the salad has not been tossed, you can store it in an airtight container for up to 4 days. If it has been tossed, it’s best to eat it within 24 hours since it will be soggy after that. The dressing will keep well for up to 1 month in the fridge.
This recipe comes from someone at a Windsor Firehall but I'm notsure who's recipe it is. This was served along with fish tacos andcomplements many other sandwiches including burgers!
45 mins
30 mins
15 mins
8
Dressing:

When visiting relatives on Pelee Island this salad became a Hall family favourite and a much requested salad.
Not Mentioned
Not Mentioned
Not Mentioned
Not Mentioned

This recipe was made popular by my cousin Peg Lalor.
Not Mentioned
Not Mentioned
15 minutes
Not Mentioned
Quinoa:
Dressing:

Quinoa is a nice, healthy grain and makes a great base to this salad. The trick to making good quinoa is to cook it in a stock rather than water.
1 hr
30 mins
30 mins
6
Cook Quinoa:
Make salad:
Chicken is a nice addition if you have some leftovers or keep it vegetarian. Life is full of options!

Not Mentioned
Not Mentioned
Not Mentioned
Not Mentioned

Jane was introduced to this fish dish by a friend who found it on the internet. A few little tweaks and it's perfect now! Makes a great appetizer or full meal. For an appetizer use ramekins or if serving as a meal you can use an oven safe bowl.
1 hr
30 mins
30 mins
4 Bowls/8 Ramekins

Not Mentioned
Not Mentioned
Not Mentioned
Not Mentioned
For a different taste I substitute the lemon pepper and salt with 1 to 2 Tbsp of Oyster Sauce.


Since I am a mediocre cook (at best), I was always assigned to make these potatoes for the family gatherings. On one of these occasions, I decided to switch it up and make something else. Well, bad idea! I thought the Taylor boys were going to cry when they found out about the omission. So here is the recipe. Enjoy boys!
Not Mentioned
Not Mentioned
1 hour
Not Mentioned
Mix and put in a 9 x 12” baking dish and bake at 350℉ for 1 hour.


Once a month my ladies group meets for dinner. One month one of the ladies (Debbie) hosted a lemon party and we all brought lemon dishes to the pot luck. This recipe (by Lucia) was the star of the show.
Not Mentioned
Not Mentioned
Not Mentioned
Not Mentioned


Not Mentioned
Not Mentioned
Not Mentioned
Not Mentioned


Not Mentioned
Not Mentioned
Not Mentioned
Not Mentioned
To dry your own bread cubes, spread on a baking sheet and drape with a clean kitchen towel. Let them dry out at room temperature over 2 - 3 days.
If you don’t have the time, you heat the baking sheet at 225 degree oven for 30 to 40 minutes until dry.

Simple ingredients and makes a great side dish or lunch.
30 mins
10 mins
20 mins
4

This recipe makes a great side dish or lunch that has a healthier twist using quinoa instead of rice. Jane learned some of these Asian inspired recipes while watching "Wok with Yan" in her teen years with her mom. Feel free to substitute rice for the quinoa if you prefer that.
Not Mentioned
Not Mentioned
Not Mentioned
Not Mentioned

This recipe came from a Thanksgiving dinner party at Sue (Hall) Pekor's and was prepared by her daughter and son-in-law.
Not Mentioned
Not Mentioned
25 minutes
Not Mentioned
Potatoes:
Topping:
Not Mentioned
Not Mentioned
Not Mentioned
Not Mentioned
1 1/2 cups water
1 1/2 cups chicken stock (or bouillon)
1 head of broccoli
4 large boiled potatoes
2 cups cauliflower
3/4 cup minced celery
3/4 cup minced onion
3 tbsp melted butter
3 tbsp flour
1 cup table cream
1 cup milk
1 tsp salt
1 tsp white or black pepper
Shredded cheddar cheese
In a saucepan, bring water and chicken stock to a boil. Add broccoli and cauliflower and turn down heat; cover and simmer until tender (2-3 minutes). When tender, remove about 2 cups (without water), cover it, and set aside along with 2 of the cooked potatoes.
To the remaining broccoli and cauliflower add the remaining cooked potatoes (cut into bite size pieces) and continue to simmer.
In a frying pan, cook celery and onion in melted butter for 8 to 10 minutes, or until tender but not browned. When done, add flour stirring constantly; cook over moderate heat for a few minutes without browning. Remove from heat, cover and set aside.
To the simmering cauliflower, add cream, milk, salt and pepper; heat soup close to the boiling point but do not let it boil. Add the flour mixture to the soup, stirring constantly.
Simmer a few minutes over medium-low heat, stirring constantly with a wire whisk or spoon, until mixture thickens slightly.
Puree the soup in a food processor or blender. Cut reserved broccoli, cauliflower and potatoes into small pieces and add to soup mixture.
Adjust seasonings to taste.
To serve, put a sprinkle of grated cheddar cheese in bottom of soup bowls and pour soup over top.